Below are instructions on How to Flash Stock ROM on MediaTek (MTK) Android Devices using Smart Phone Flash Tool (SP Flash Tool). Follow the instructions on how to flash Stock ROM on your MediaTek (MTK) Android Devices carefully. We will not take any responsibility for whatever that may happen to your device.
Caution: Make sure you are downloading the exact firmware of the device you want to flash because flashing a wrong firmware will make the device completely dead, can’t power on, can’t charge and will not be detected by a computer.
Requirements:
[*] Your device battery should be at least 45-50 percent charged before performing the process.
[*] Make sure USB Drivers are properly installed on your Computer to ensure that the device gets connected (skip this step if drivers are already installed).
How to Flash Stock ROM using SP Flash Tool
Step 1: Power Off or Shut Down the device you are about to flash. Remove the battery (if it is removable) and reinsert, but don't Power On the device.

Step 2: Download and extract SP Flash Tool on your Computer. On the extracted folder you will see the following files.

Step 3: Launch the flash_tool.exe

Step 4: Once the SP Flash Tool is launched, click on the Download tab.

Step 5: On the Download menu, click on the Scattter-loading button or click on the middle Choose button (for latest versions of SP Flash Tool).

Step 6: Now, Navigate through your Computer and select the Scatter file from the Stock ROM folder you downloaded. (if the file is in zip or rar format, extract the file, on the extracted folder, there you get the Stock ROM of the device, select the Scatter file).

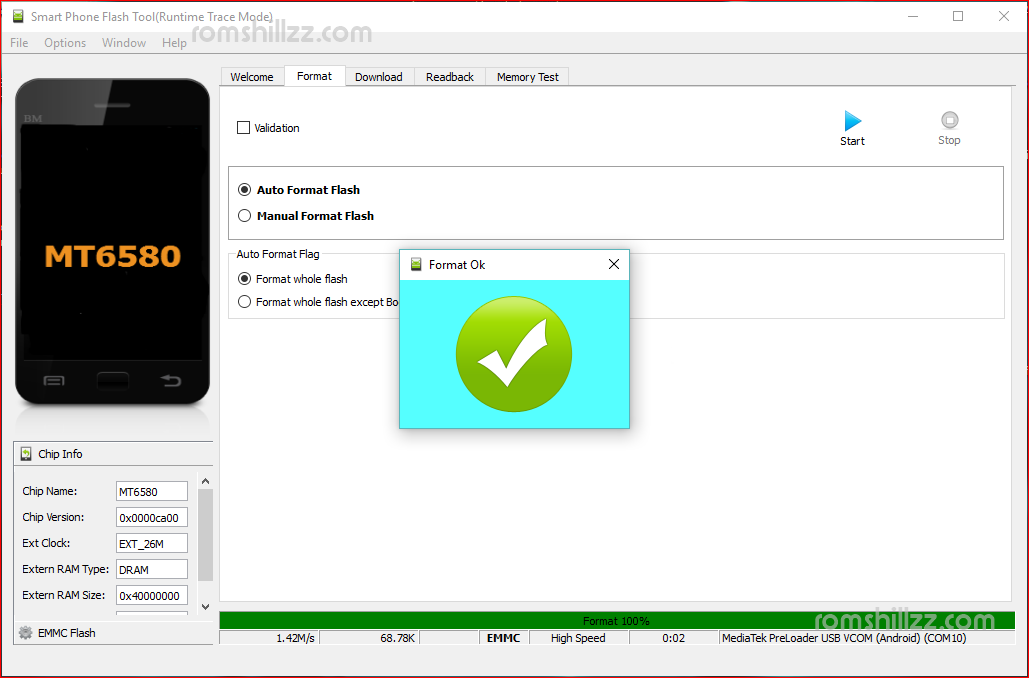
Step 7: Once the Scatter file has been loaded, click on the Format Tab.

Step 8: On the Format menu, click on the Start button.

Step 9: Now, Connect device to your Computer: Press and hold the Volume Up and the Volume Down button of your device, Plug the USB Cable and wait for Computer to Detect the device.
Step 10: Patiently wait for the the Format Process to complete. Once the process is completed, a Green Ring will appear.
Step 10: Once the Format process has been completed, click on the Download Tab.
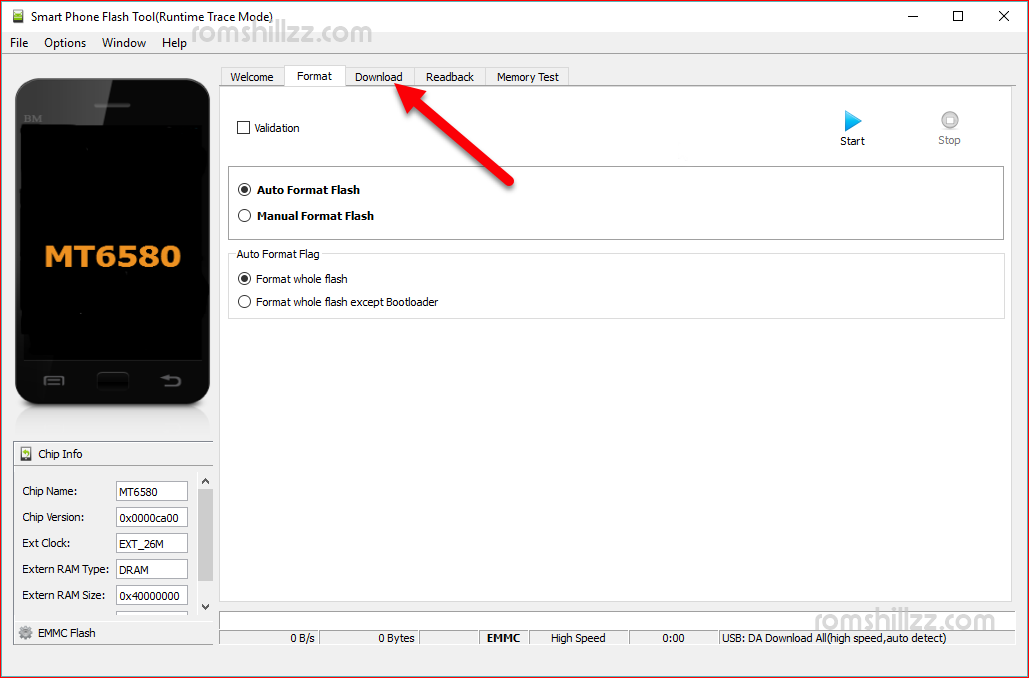
Step 11: On the Download menu, click on the Download button.
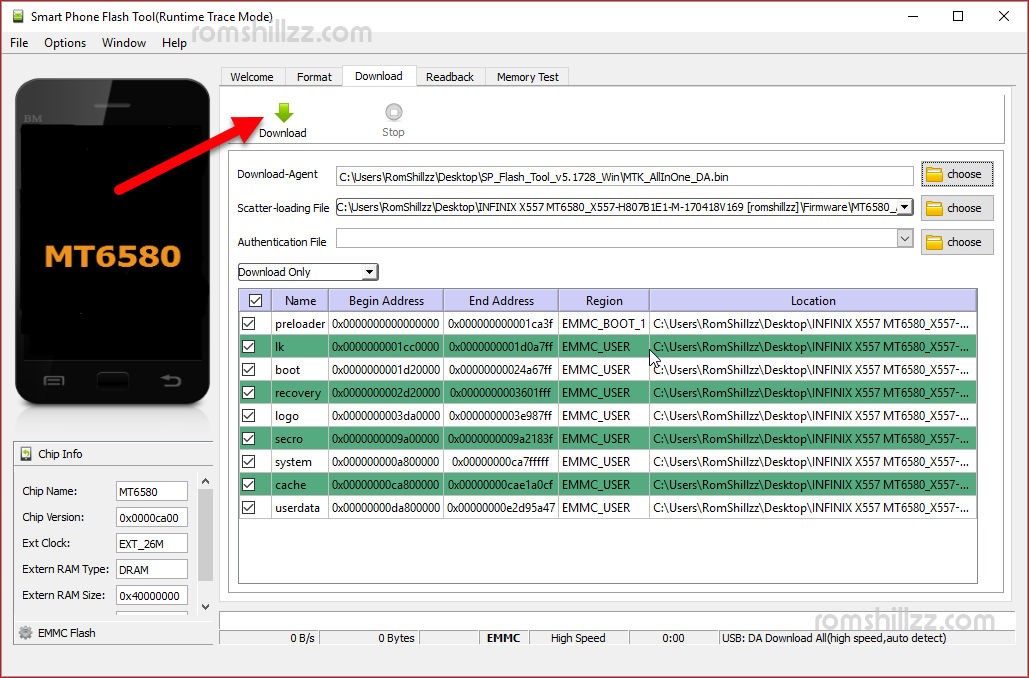
Step 12: Now, Connect device to your Compute as in Step 9. Patiently wait for the the Download Process to complete. Once the process is completed, a Green Ring will appear.

Congratulations, the Firmware has been successfully Downloaded to your device!
Important Notes:
[*] In Step 7: Instead of selecting the Format Tab and latter selecting the Download Tab, from this step, just select the Format All + Download option on the SP Flash Tool, click on the Download button and connect your device.
[*] In Step 9: You can also connect the device using the Power button; Plug the USB Cable and Press the Power button of the device.
[*] Take a backup: Take a backup of your personal data before using SP Flash Tool because all data on your device gets wiped during the flashing process.
[*] Read flash: It is always advisable to backup the firmware of the device you are about to flash unless the device is completely dead (can't power on).
[*] Warranty Void: When flashing a Custom ROM using SP Flash Tool Tool, it may void the warranty of your device. Please note that Stock ROM don't void warranty.
[*] Read me: Make sure you read & follow this tips & guides before you completely proceed to flashing your device using SP Flash Tool. These tips are very important to be ignored.