This is a tutorial on how to Root Tecno W2.
What Is Rooting?
Rooting can be said to be Android jailbreaking. Its simply a means of unlocking the operating system of a device so you can install unapproved apps, delete unwanted bloatware, update the OS, replace the firmware, overclock (or underclock) the processor, writing or changing IMEI, installing fonts, customizing anything and so on.

Tecno W2 another Tecno device runing Android 6.0 (Marshmallow).
This simply means that rooting this device could sound difficult but it’s simply easy to execute if you carefully follow the few steps given bellow.
How To Root Tecno W2
|
STEPS »
STEP 1: Download and install Miracle Box Drivers v1.0 to your PC.
STEP 2: Download SuperSU.zip >> SR3-SuperSU-v2.79-SR3-20170114223742.zip or SR1-SuperSU-v2.78-SR1-20160915123031.zip.
STEP 3: Backup your device firmware in scatter format using miracle Box.
STEP 4: Copy SuperSU.zip to both the device internal storage and SD card (external storage).
STEP 5: Create a new folder name RomShillzz on your PC.
STEP 6: Copy preloader.bin from your Miracle Box backup into the RomShillzz folder you created.
STEP 7: Download Philz for Tecno W2 [romshillzz].
STEP 8: Extract the Philz file and copy the Philz recovery.bin and scatter file to the RomShillzz folder, making peloader.bin, scatter file and recovery.bin in the folder.
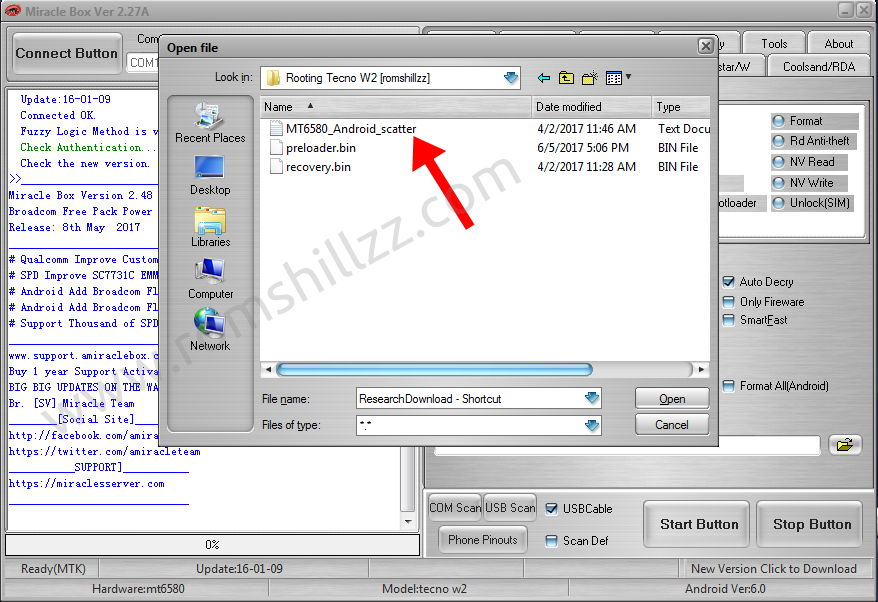
STEP 9: Flash the preloader.bin and recovery.bin using Miracle Box.
STEP 4: Copy SuperSU.zip to both the device internal storage and SD card (external storage).
STEP 5: Create a new folder name RomShillzz on your PC.
STEP 6: Copy preloader.bin from your Miracle Box backup into the RomShillzz folder you created.
STEP 7: Download Philz for Tecno W2 [romshillzz].
STEP 8: Extract the Philz file and copy the Philz recovery.bin and scatter file to the RomShillzz folder, making peloader.bin, scatter file and recovery.bin in the folder.
STEP 9: Flash the preloader.bin and recovery.bin using Miracle Box.
Flashing the Preloader.bin and Recovery.bin using Miracle Box.


STEP 10: Boot the device into recovery mode by pressing and holding Volume up button + Power button.
STEP 11: In the Philz recovery,use the Volume buttons to navigate and Power button to select.
STEP 12: Select Install zip.
STEP 13: Choose zip from /storage/.
STEP 14: Navigate to the location of the SuperSU.zip and select it.
STEP 15: Click Yes Install SR1-SuperSU-v2.78-SR1-20160915123031.zip.
STEP 14: If you are prompted to fix root, select No.
STEP 15: Patiently wait until the flashing process is complete.
STEP 16: After the flashing process is completed, Reeboot Device normally.
Now you have successfully rooted your Tecno W2!
Confirm Root: Download and install Root Checker from Google Play Store or from here
|
Please Leave a comment after using this Tutorials
Report if you cannot do this.
Load Comments